|
Homeowners Guide to Changing Ac Thermostats
How to change thermostat or replace Ac thermostats. This easier to understand guidelines is for low voltage residential thermostat. Low voltage residential thermostat is 6 to 30 volt system. Most home thermostat is 24 volt. Before replacing or installing a new thermostat, is there something wrong with the existing thermostat? I had seen people replace thermostats because their house is not heating. If it’s not broken, don’t fix it. If we want to install new thermostat, please continues. Btw, what type of thermostat are we replacing? Mercury thermostat:
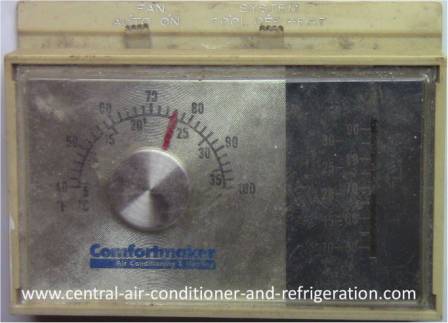
Digital HVAC thermostat: 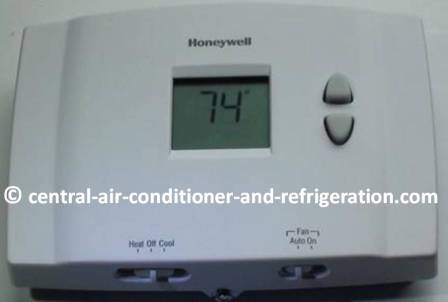
Digital and programmable thermostats: 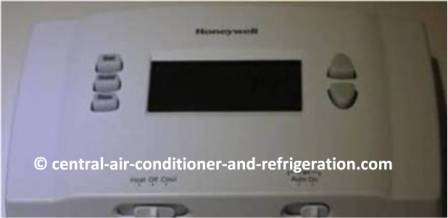
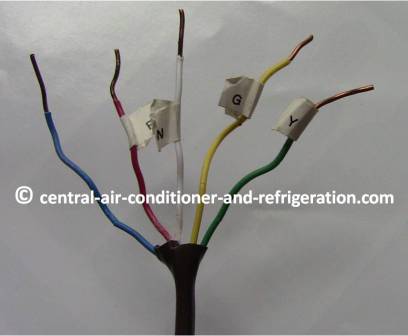
Step 1: What types of air conditioner thermostat we need? Do we need manual or automatic thermostat? There is an ac thermostat that could automatically adjust the temperature at specific hour, day, and month, but we have to program it first. This is also known as programmable thermostat. Programmable thermostat is the best option if we’re not home often. It could set the house temperature at specific hours of the day or month. These programmable thermostats have the potential to save money on our heating and air conditioner unit. Unfortunately, much people don’t know how to use it. Manual air conditioner thermostat is regular thermostat that we adjust at whatever temperature we needed. This thermostat is best for those who come home often or at home business. Air conditioner thermostat compatibility After determined the air conditioning thermostats we need. Now we have to pick the thermostat that is compatible with our heating and air conditioner. If it’s regular heating and air conditioner units, then buy ac thermostats for regular ac units. To determine HVAC thermostat compatibility, we should asks these question: Is our HVAC system both heating and central air conditioning units or heating only, or central air unit only. Is our system Heat Pump? Is our HVAC system single stage or multistage? Another way to determine compatibility is by looking at the wire coming to the existing thermostat. So, how many thermostat wires coming to the existing thermostat? This only work, if we pick the right thermostat for that specific Ac unit.
Required tools to replace home thermostat:
Safety Precaution: Before removing and installing ac thermostats, turn off electricity to the central air conditioning unit. Don’t turn the electricity back on until all thermostat work is complete. There should be On/Off switch near the furnace, so turn it off or turn off power to the entire central air conditioner units (breaker panel). If we believe we turn the power off. Try turning the thermostat Fan to ON position. If the blower doesn’t runs, it means there is no 24 volt power to the thermostat. It we have multimeter, used it. Step 2:
Remove an existing HVAC thermostat guideline:
Older HVAC thermostats have subbase, thermostat assembly, and cover. However, new thermostats have subbase and the thermostat assembly and cover are together.
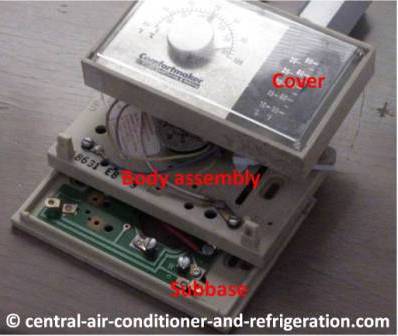
Make sure to label the thermostat wire on our existing thermostat to match the subbase terminal names of the existing thermostat. For example: Red wires supposed to be 24 volt wire and G terminal is for blower (fan). Let’s said red wire from the air conditioner unit is connected to G terminal of the thermostat subbase. Then label the red wire as G. Red wire supposed to be 24 volt wire. In this case red wire is for blower (fan).
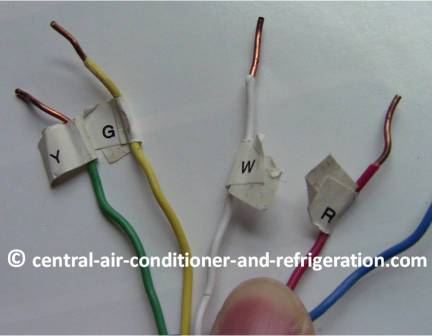
Thermostat color coded is not universal, each thermostat manufacture has it own color coded. So, don’t depend on wire colors to choose labels. Label thermostat wire accordant to subbase terminal name. That is important. Step 3: How to replace or install thermostat guidelines:
The thermostat wire has to be proper wire and connect for heating and air conditioner to work. After securely connecting all thermostat wire, make sure bare wires DOES NOT touch each other.
For homeowners, who try to save money on thermostat I had seen homeowners try to save money on thermostat by replace existing and broke thermostat with used thermostat. Here is information to consider before replace existing and broke thermostat with used thermostat. Step 1: Is the used air conditioner thermostat working fine? Is the thermostat right for our AC unit? Step 2: Make sure the thermostat subbase, thermostat assembly, and thermostat cover are matches. It won’t work if we don’t have match subbase and assembly. The best way to determined if it matches is by putting all the three parts together or checks the number on the thermostat. Step 3: There are no missing screw, wire, or connector within the thermostat subbase. These are information we need to consider if we’re to trying to save money by reused a thermostat. It would be best to have new thermostat. I would highly recommend buying new ac thermostats.
Return to central air conditioner and refrigeration cycle |


